Getting Started with Affiliate.com

There are only a few, quick steps to setting up your Affiliate.com account. Check out the new written and video documentation to guide you!
For help setting up your account, you can navigate over to the Get Started Tab for written instructions or check out our Resource Library for video instructions.
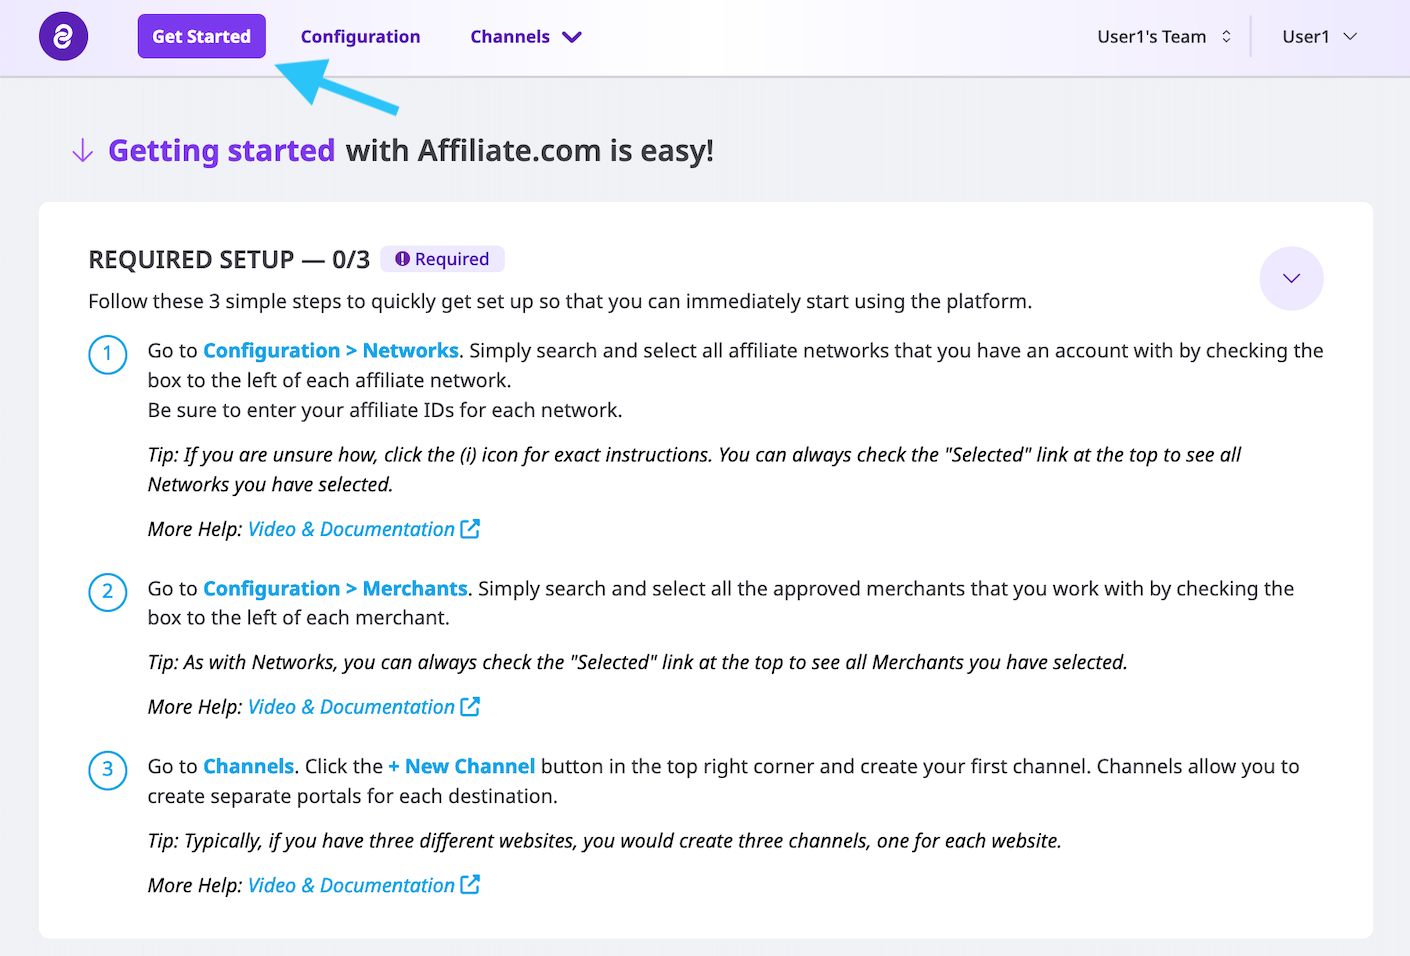
The Get Started Tab is accessible at all times on your Affiliate.com account.
This is a one-time set up where you will add every network that you have joined and have an account with. For example, Amazon, CJ, AWIN, Rakuten. You can see the full list of networks that are integrated on Affiliate.com here.
This is a one-time set up where you will add every merchant that you have joined and been approved for through the networks. For example, Target, Walmart, Best Buy, or Barnes & Noble.
A Channel is any place where you want to promote affiliate offers. For example your website, blog, app or your social media channel. It is recommended to create one Channel for each place you will be promoting affiliate offers. For example, if you have three different websites, you would create three different channels.
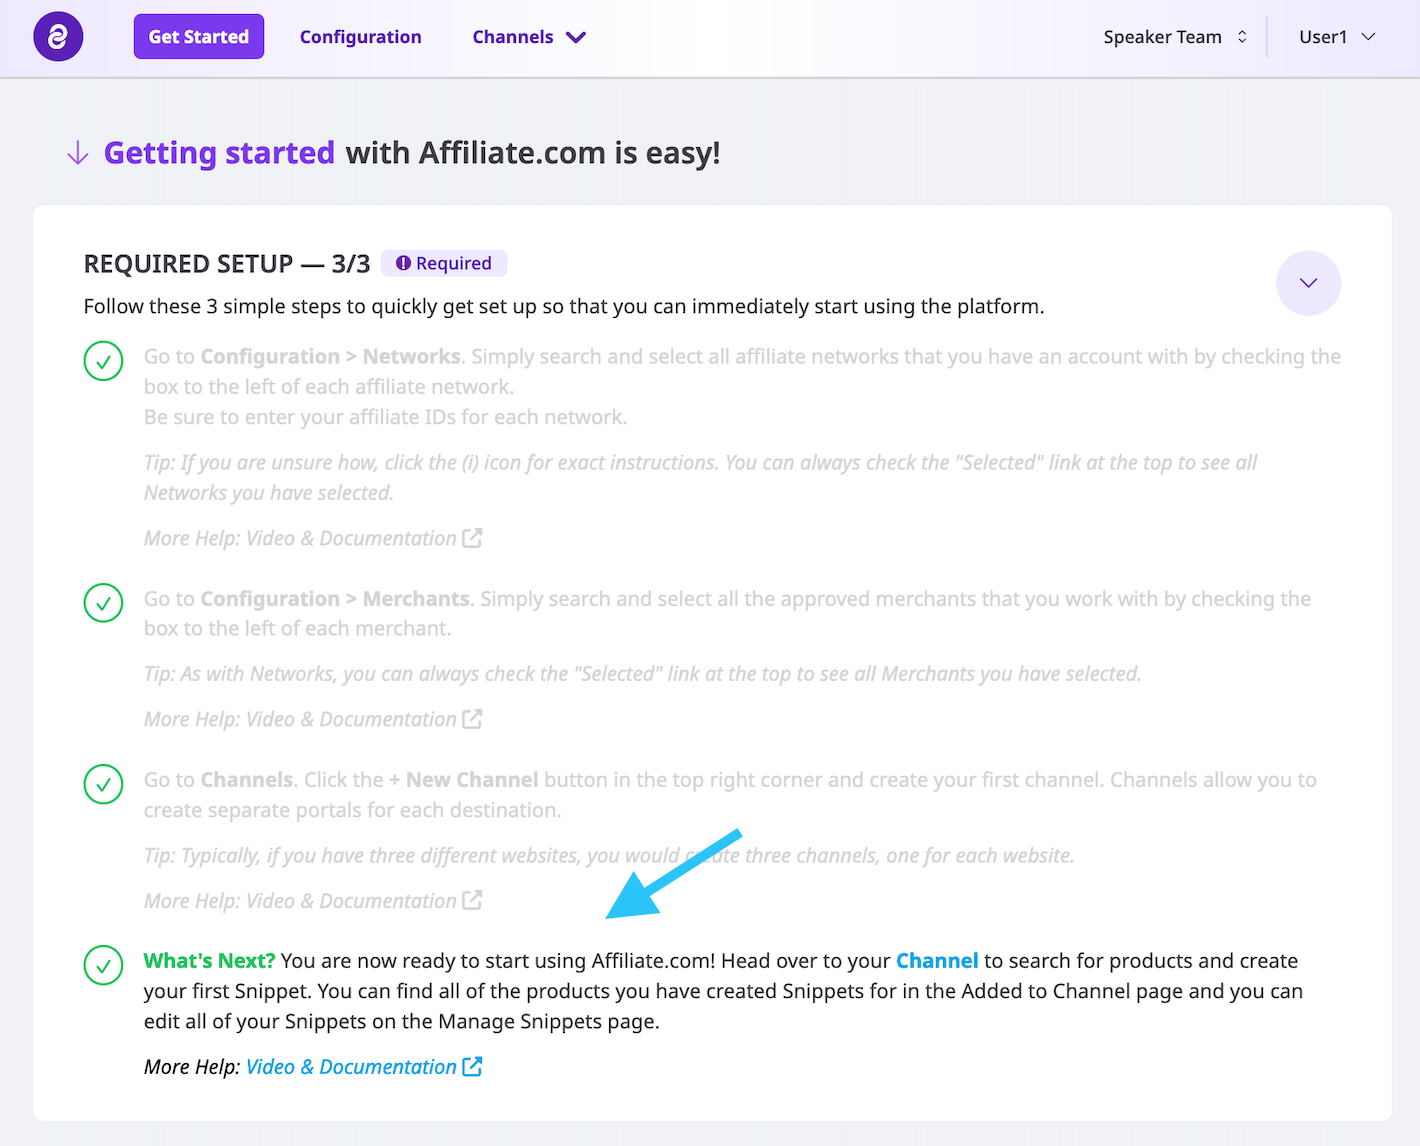
Once you're done, you're ready to start using your account!
You can then start searching for products and creating Snippets!
For more information about using Affiliate.com, check out our full Resource Library here.