New Networks Page!

We’re excited to share the Affiliate.com’s network page has a brand new look!
This makes it easier than ever to complete your one time set up of selecting and adding networks.
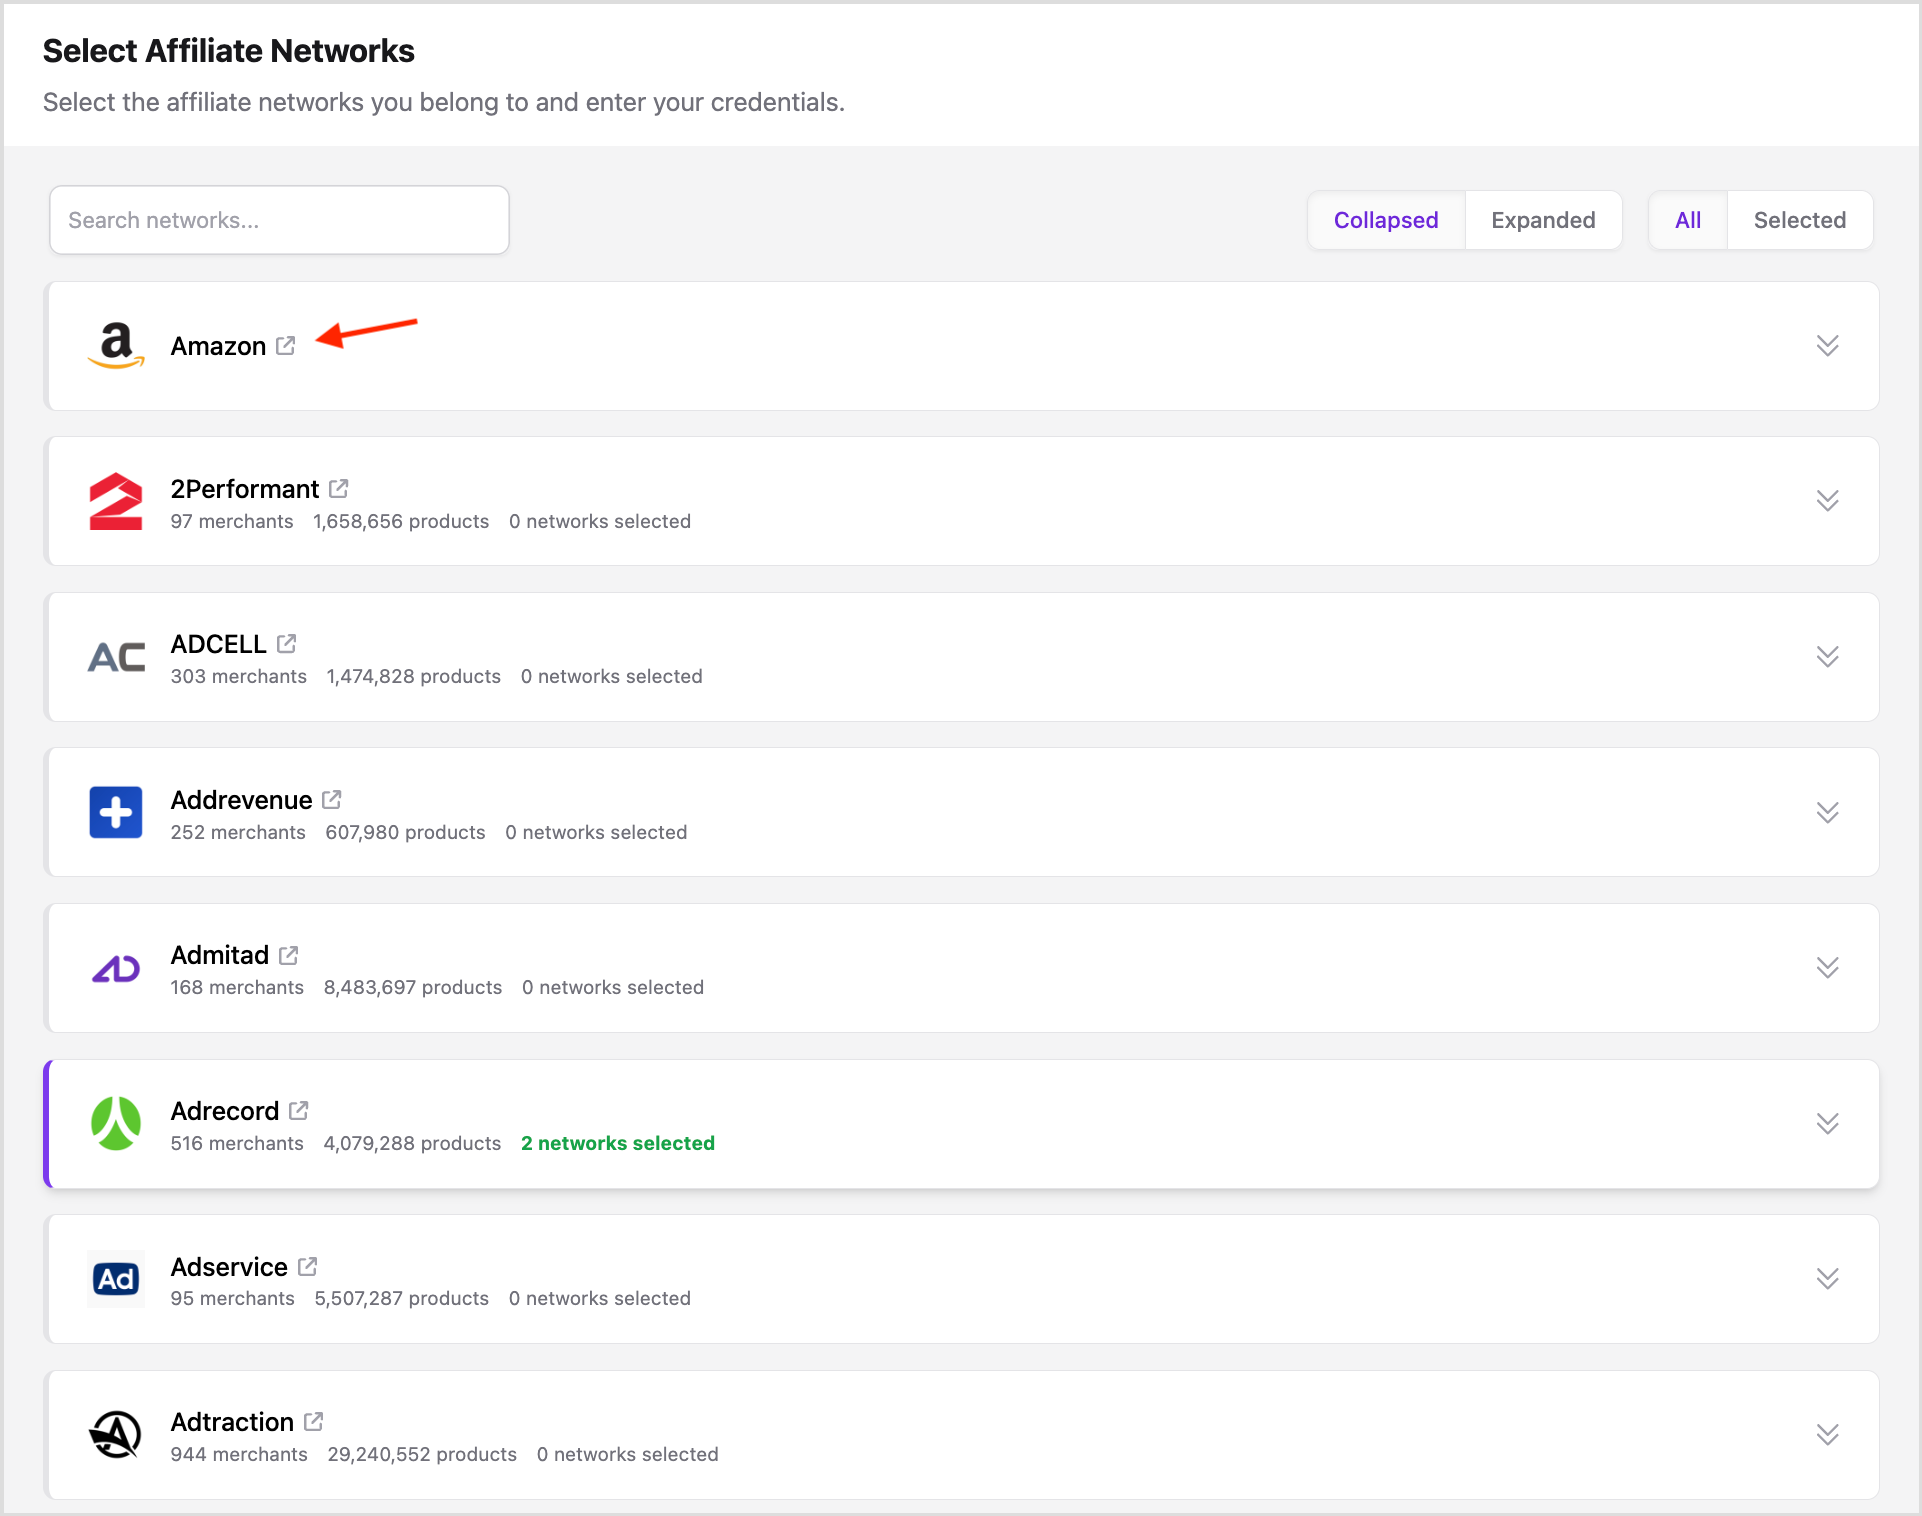
On this page, you will find every network that is supported on Affiliate.com. This includes Amazon, Impact, CJ, Awin, as well as 30+ other major networks. To learn more about the network, click the arrow next to the network’s name to visit the network’s homepage.
- And if you don’t see your preferred network listed, let us know here!
Select Network(s)
Many of the networks support various geographical locations. For example, Avantlink offers networks in Australia, Canada, and US.
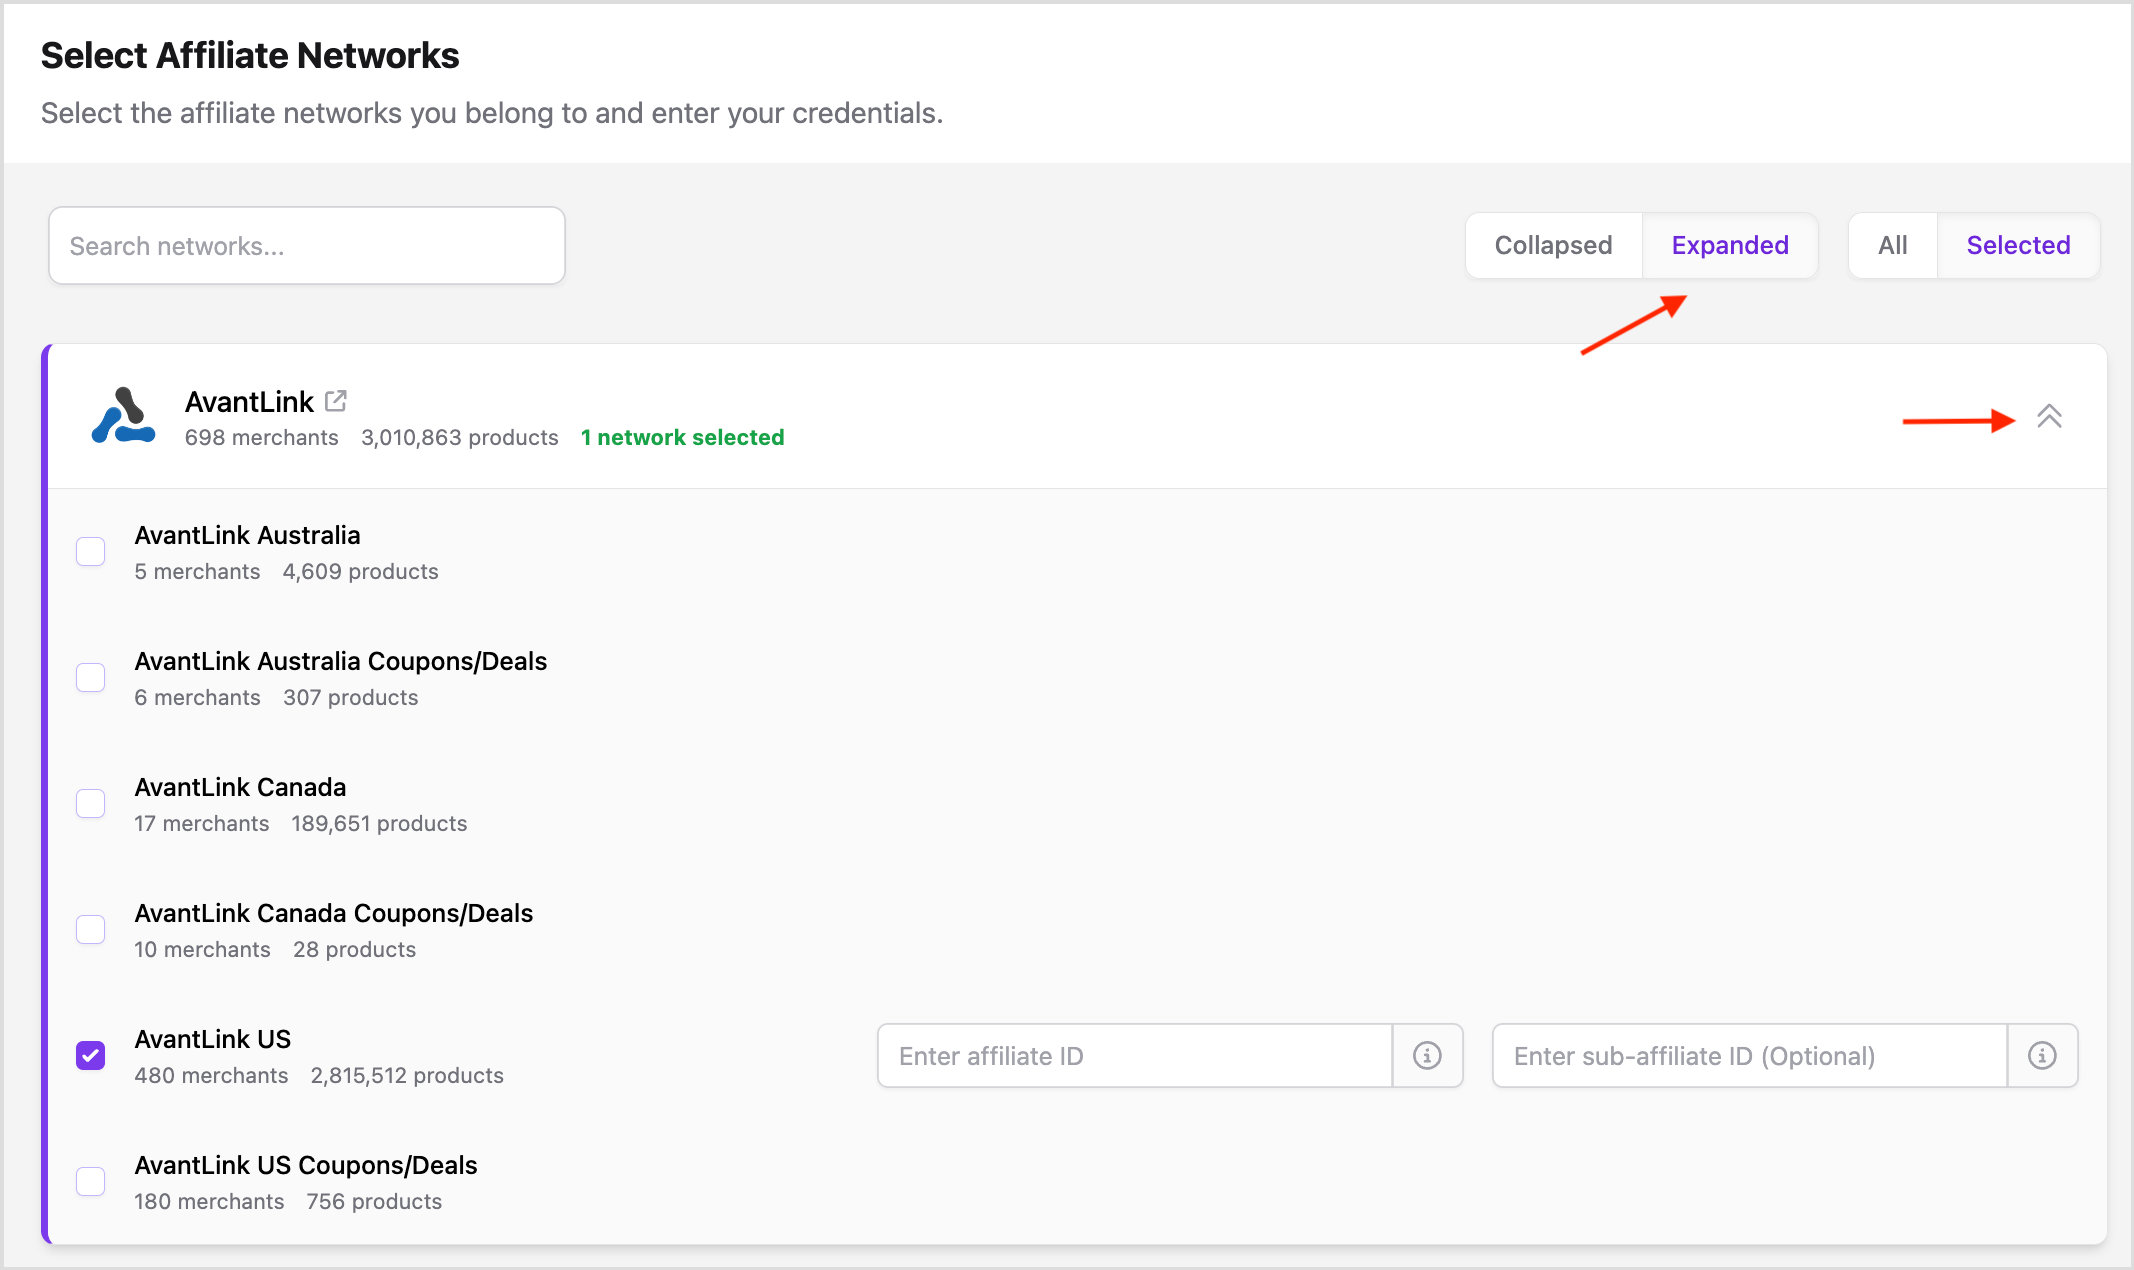
To see the supported geos of each network, simply expand the network’s box. You can expand the networks individually by clicking the arrows, or press the “Expanded” button to expand all networks.
Then, select the network you’d like to promote offers from. In this case, it would be Avantlink US.
Add IDs
Once you’ve selected a network, it's time to enter in your affiliate ID. Your affiliate ID is a unique code that is provided to you by each of the networks. If you forget where to find your affiliate ID, simply click on the i icon next to each network for instructions on where to locate your ID. Or, click here.
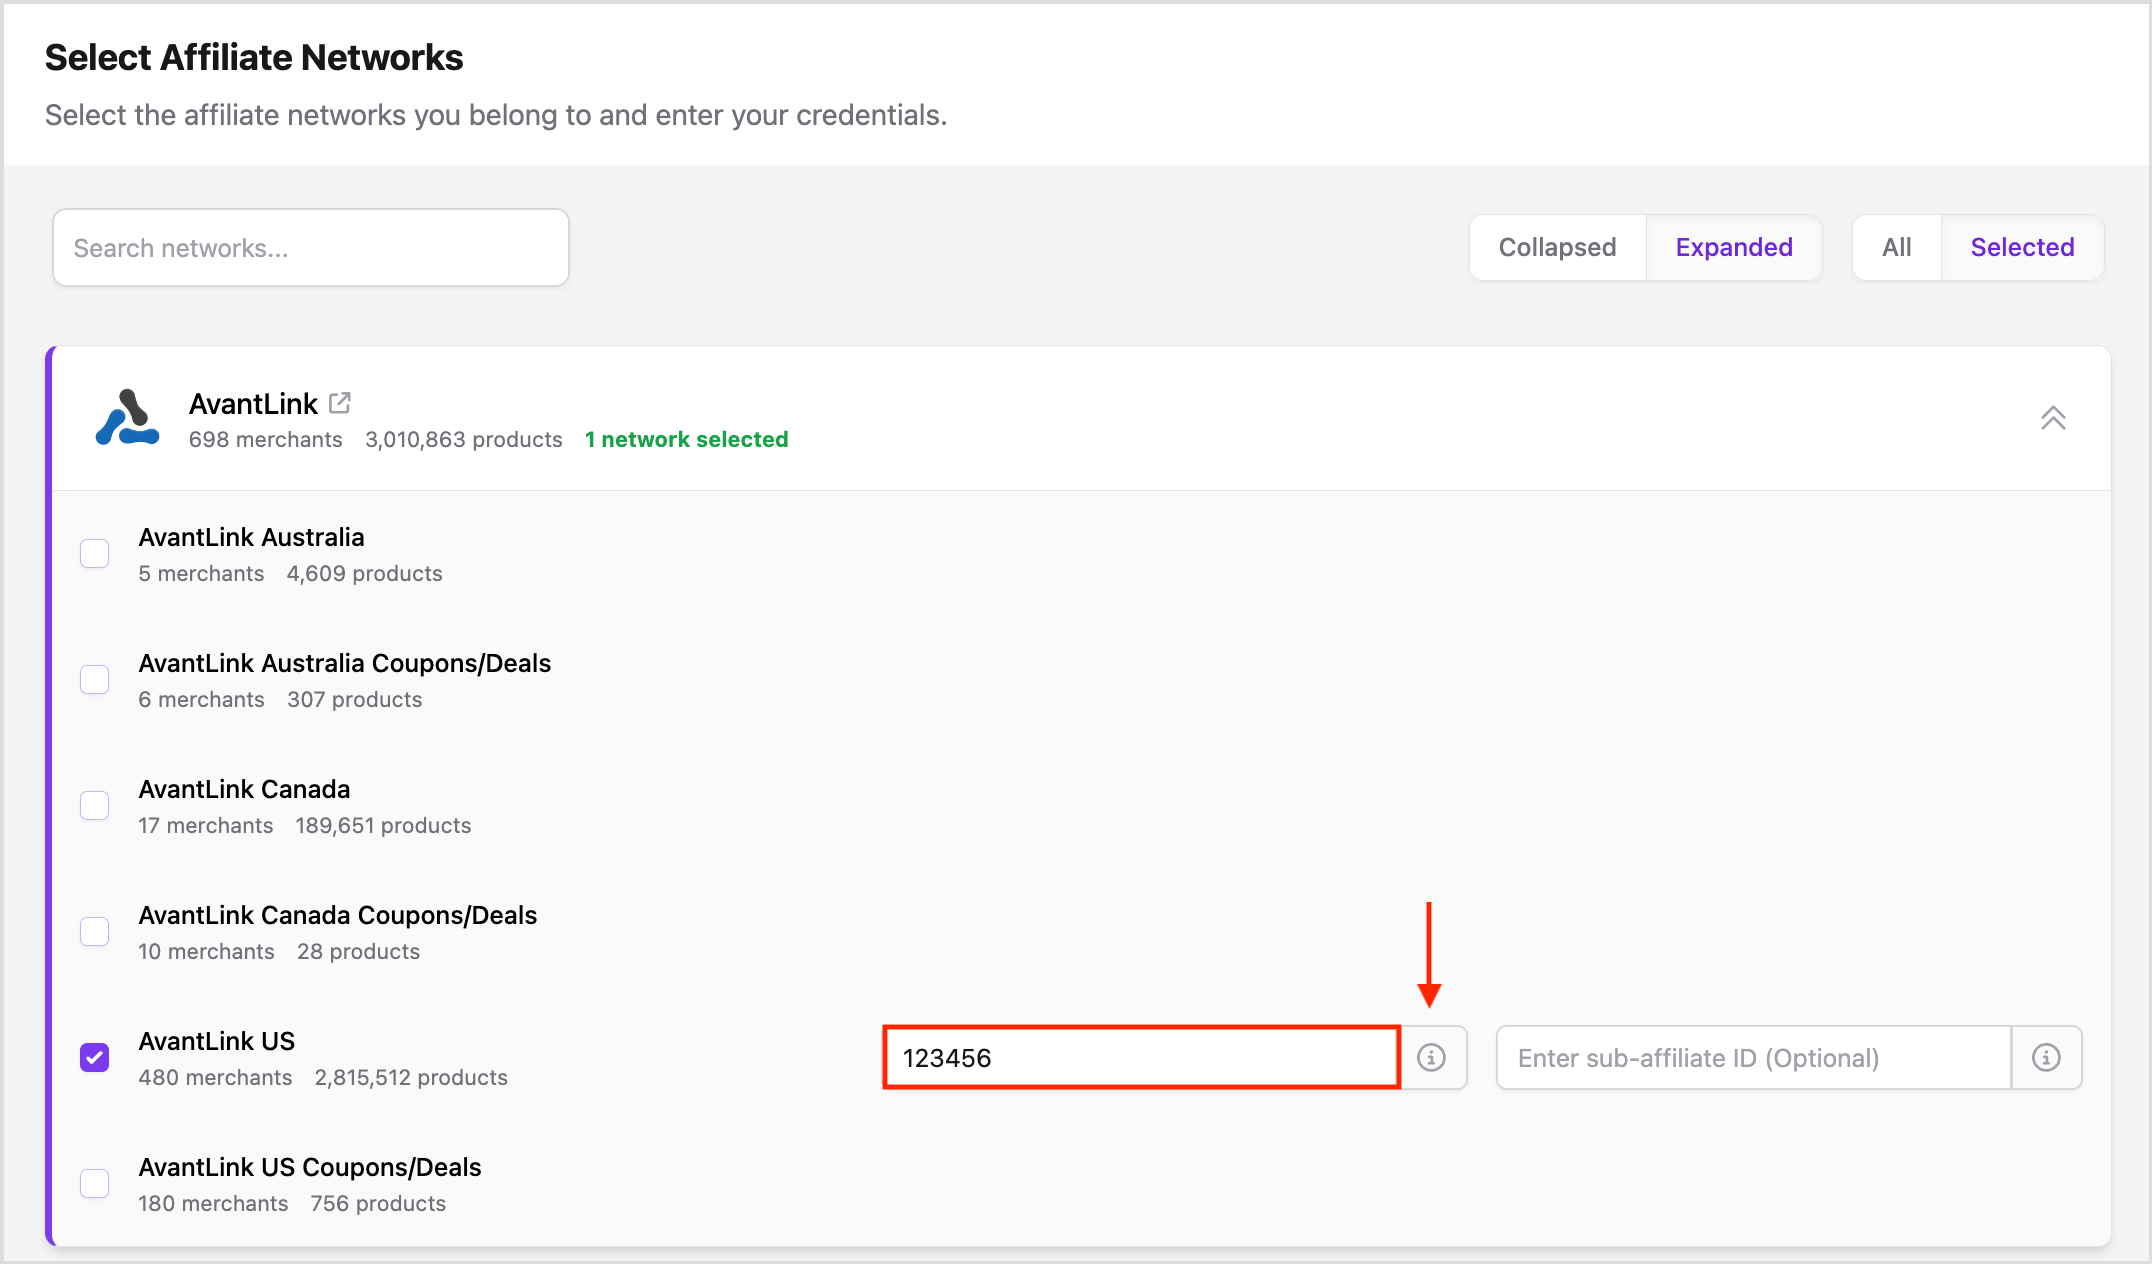
It is required you enter in your affiliate ID for each network you want to promote. This ensures that your affiliate links will work as expected and the commissions you earn will be correctly attributed to you.
The Sub-ID on the other hand, is optional. This is a custom value you can add and pass to the affiliate network for tracking extra information. You can choose to enter in a value, or leave it blank.
That's it!
Simply repeat these two steps until you have successfully added all the networks you are part of. Then, you're done and ready to add your merchants!
Remember, this is a one time set-up. The networks you have selected and the IDs you have entered will automatically be saved to your account. They will be applied to any Channels (website, blog, email, app) that you add to your team now or in the future, unless you choose to override these settings on the Channel level.
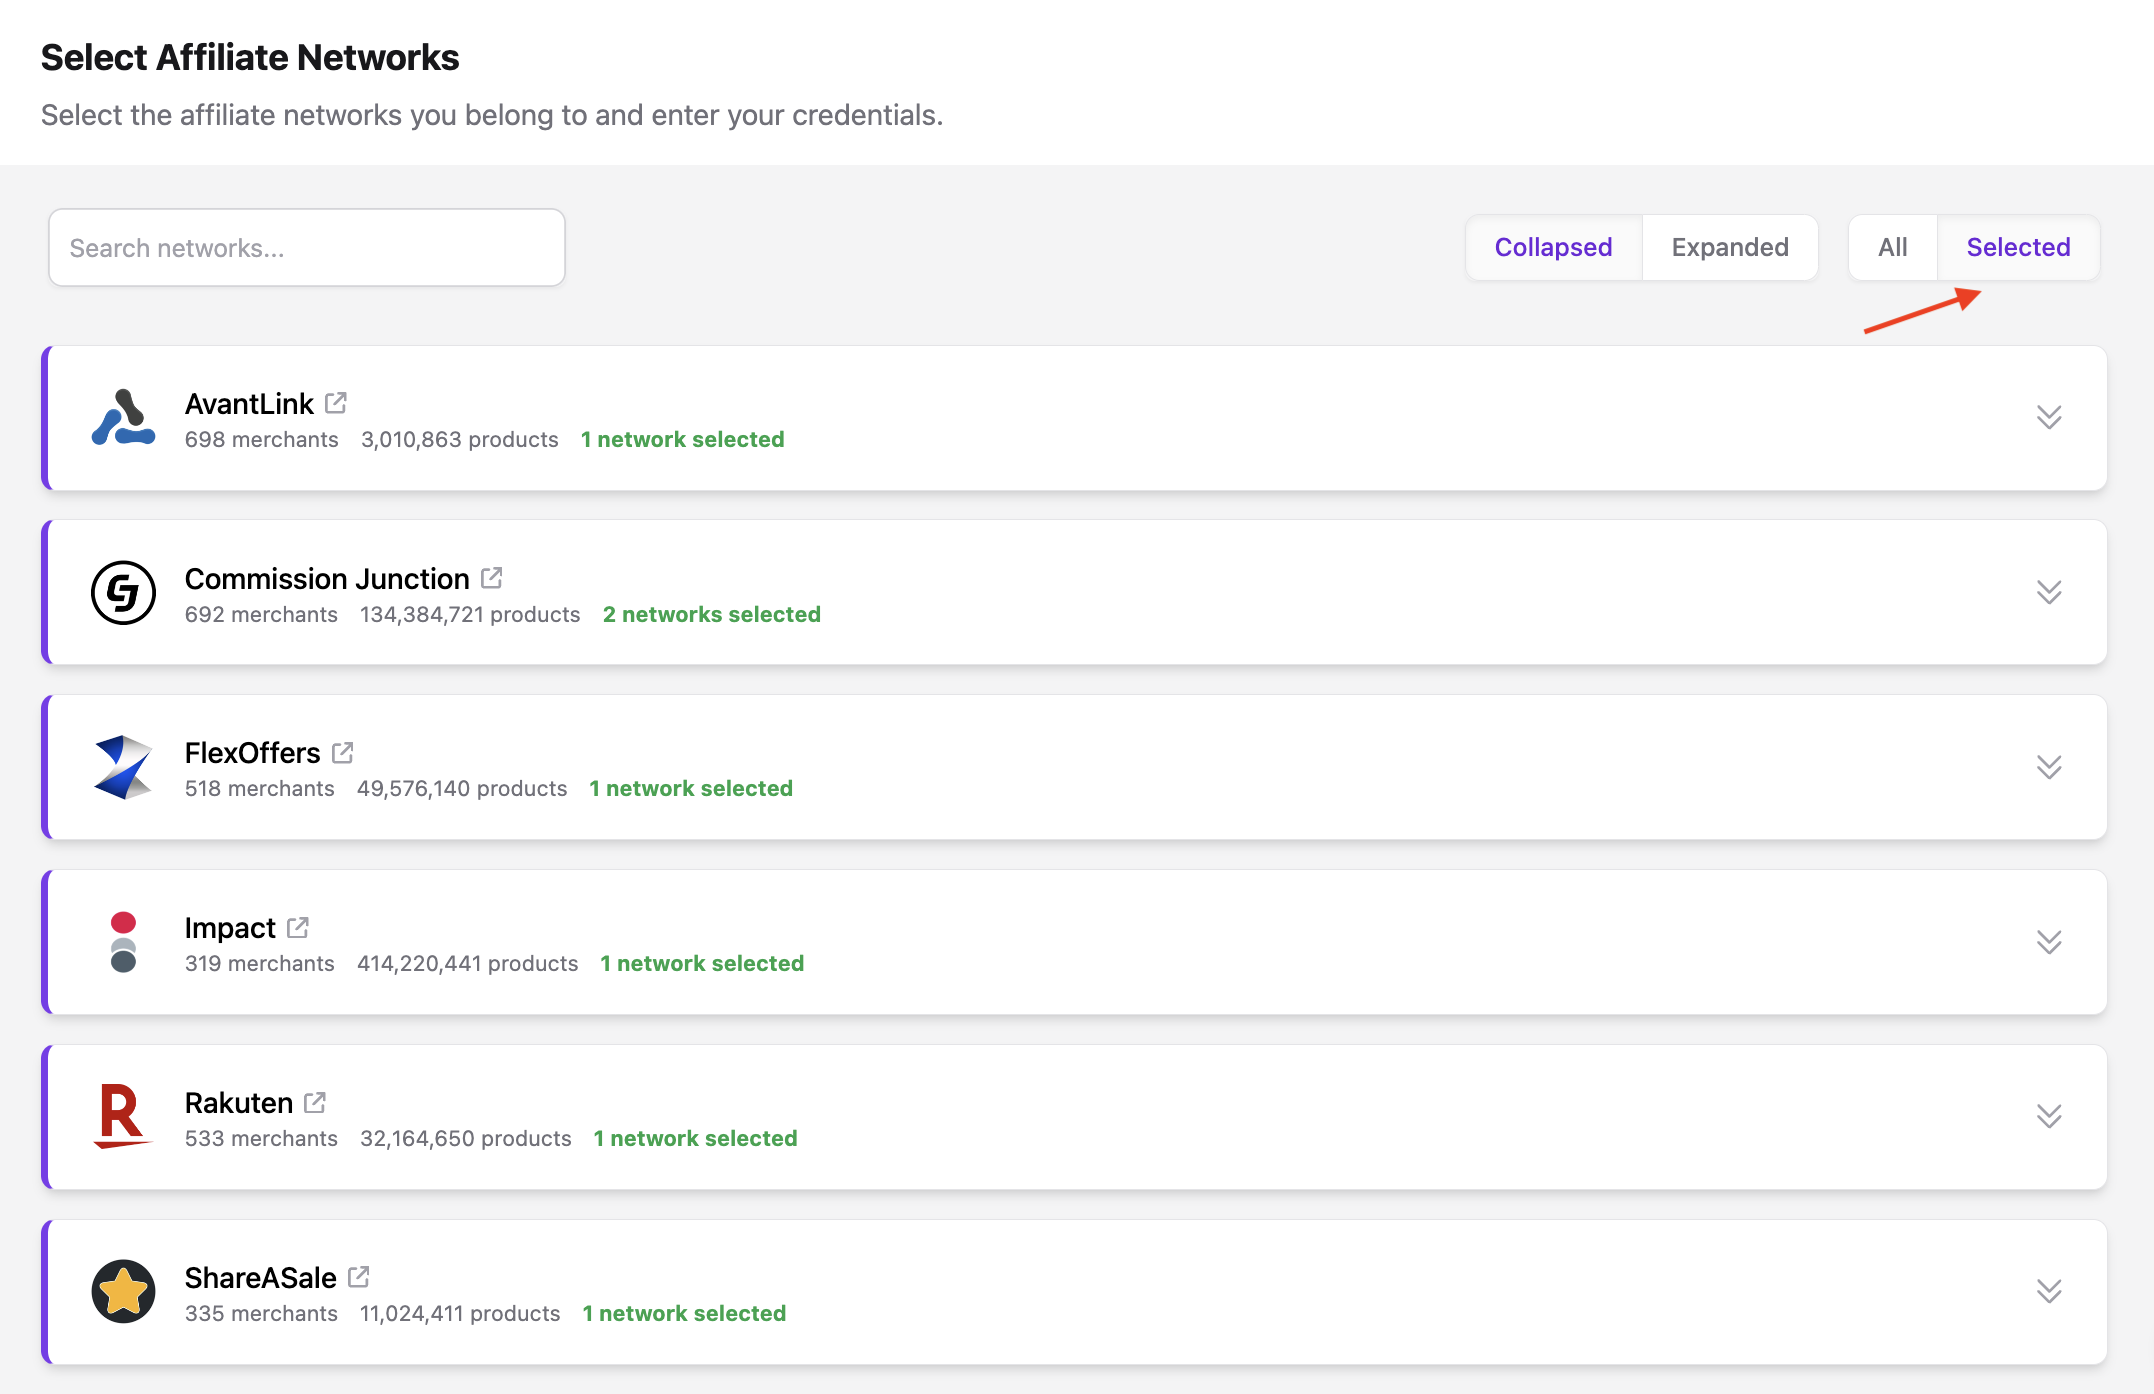
You can update the settings on the Networks page at any time. You can also see your added networks by pressing “selected.” This will allow you to filter by just the networks you have added.
Be sure to check it out for yourself!